

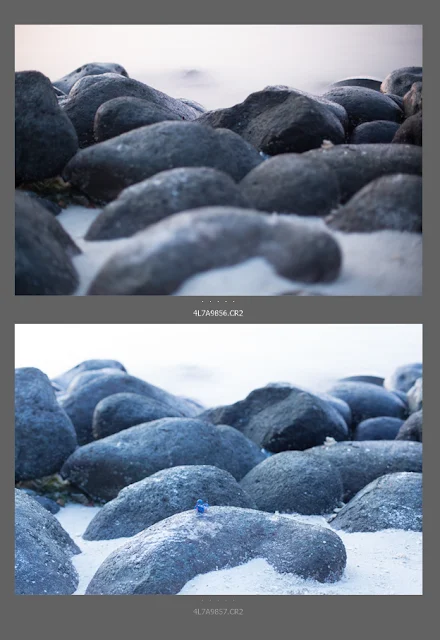
I took some photos at Punggol Beach few days backed.
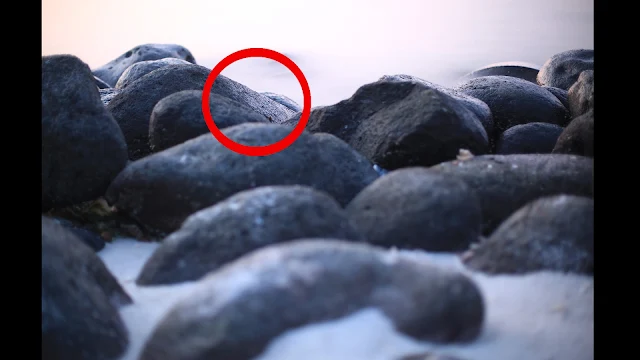
One of those were these two shots: one was just with rocks with back focus, another one front focus on my tiny Lego toy. Both shots were long exposure with different white balance temperature value.
I would like to combine both back focusing and my foreground focusing to make my photos looks much dreamy in terms of atmosphere (with middle rocks inbetween the back and front blur out naturally).
First of all to do that, follow me step-by-step.
1. Go File > Scripts > Load Files into Stacks...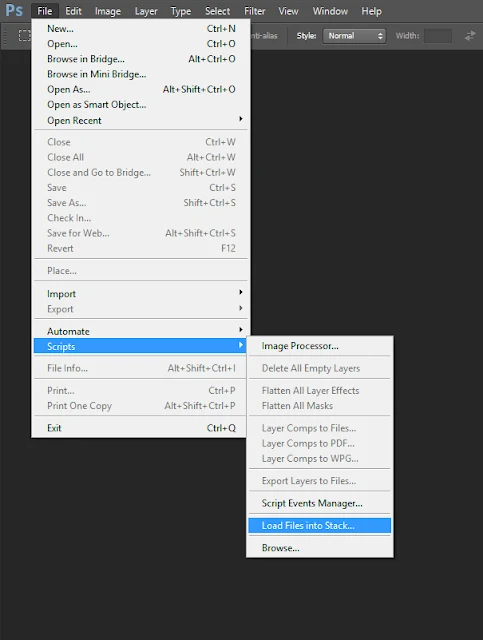
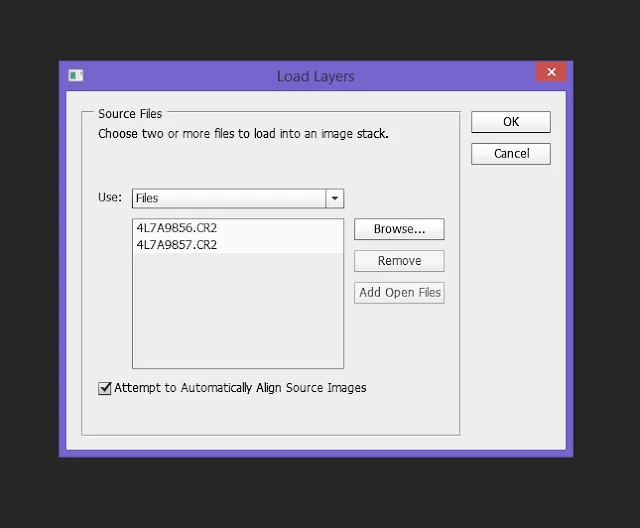
2. You'll see this Pop-up Box, Click Browse to load your file.
(It can be more than two files)Optional to tick "Attempt to Automatically Align Source Images". Some Photoshop version have another tick box for separating layers. Click ok, once you're done with this.
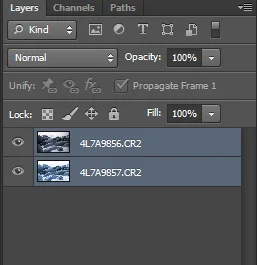
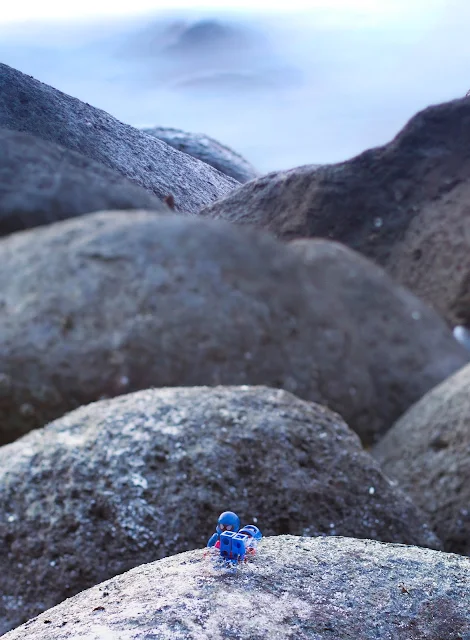
3. After clicking ok, you'll see your files opened on Photoshop.
Layers are nicely placed.
If your Photoshop version doesn't have Align option. You may use this option instead (optional).
It will align photos for you, especially if you're not on a Tripod. Different images are of different frame.
5. Steps: Edit > Auto-Align Layers
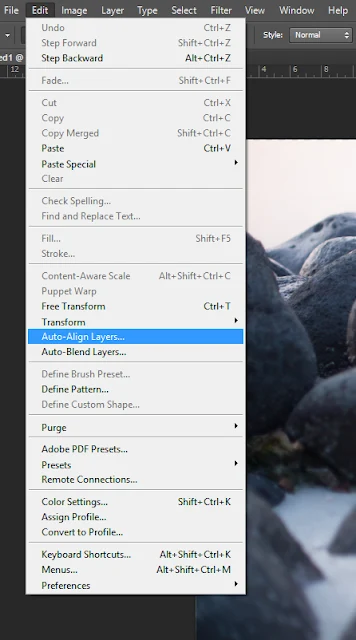
There'll be dialogue box popping out, choose option accordingly to your needs.
Blending is easy especially Photoshop is a very well-made tool. It's smart without us selecting the focused areas, it can auto detect.
6. Steps: Edit > Auto-Blend Layers
(It's underneath Auto-Align Layers)

There'll be dialogue box, after clicking the above step. Click Stack Images, and then Ok.

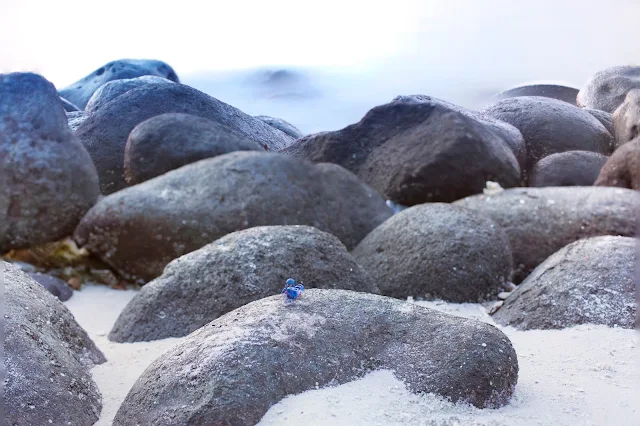
Here's the Final Stacked Photo:
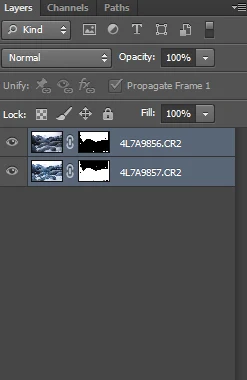
And with the detailed layers:
After this you may proceed with your other form of editing to get your Final Image out.
Here's mine!
_________________________________________________________
♥ Thanks for reading as always!
Love reading my blog? Check out my Food Photography Tips here. Drop a PM on Facebook if you've collaboration ideas with blogger aka “female" photographer Irene.